
1. Open Wallet card design
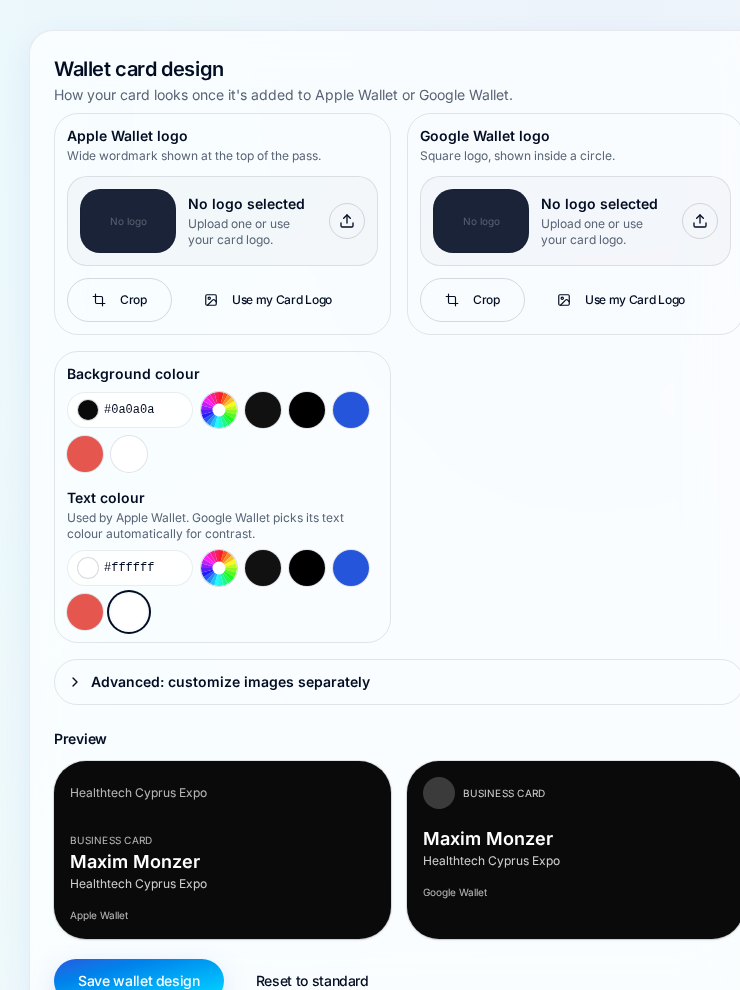
Go to Settings and choose Wallet card design. You'll see an Apple Wallet logo card and a Google Wallet logo card side by side, the colour options, and a live preview of both passes at the bottom.
Make the pass people keep in Apple Wallet or Google Wallet look like your brand — your logo, your colours.
Go to Settings and choose Wallet card design. You'll see an Apple Wallet logo card and a Google Wallet logo card side by side, the colour options, and a live preview of both passes at the bottom.
Upload an image with the upload icon, or tap Use my Card Logo to reuse the logo already on your digital business card. The crop tool opens straight after an upload so you can position it right away.
Apple shows a wide logo strip, Google shows a circle. Crop is saved separately for each one: drag to reposition and scroll or pinch to zoom until it looks right, then save. Cropping for Apple never changes your Google version.
Pick a background colour and a text colour — black, blue, red, white, or any custom colour. Google Wallet picks its own text colour automatically so it always stays readable on your background.
The Apple and Google previews update instantly with every crop and colour change. Press Save wallet design when you're happy, or Reset to standard to go back to the plain black pass.
Open Share your card and use Add to Apple Wallet or Add to Google Wallet — the button matches the phone you're on. The pass carries your branding, name, role, company and contact details.